
A recent request came in from MDB customer Matthew Turner who asked not only for a very specific candle fragrance and design...but be also wanted to see photos of the candle being made.
This type of request makes me all giddy with excitement. First because he asked for an interesting fragrance: Clean Laundry. Specifically Tide. Oh, and please also make the candle in the colors of the Tide box. I love a good challenge. Second because he wanted to see the process of the candle being made.
I pride myself on my ability to create fragrance blends that have no chemically element that I cannot stand in certain candles I've bought in the past. I also pride myself on the careful selection process of what goes in to my candles. After several tries, I finally got that "Clean Laundry" smell...and the version that makes you feel like when you get in bed with clean sheets the first time after washing them.


This is melted paraffin for the first pour, which I had already added fragrance and color additives to previous to this photo. You will see me adding them to future layers later in this post.


After pouring the rest of the first color layer (see above) It is time to melt a second pour. You can do this all at once in separate containers in your double boiler...but I like the process this way. I think it reminds me of my dad, who is a Geologist. I feel like its cheating to make them all first. Its more organic to melt as you go since it takes a lot of time for all of the cooling between layers. When I say a lot of time I mean like 20 hours. Yep. It is true. These go on for a couple of days. It has to be a passion at this level.


This type of request makes me all giddy with excitement. First because he asked for an interesting fragrance: Clean Laundry. Specifically Tide. Oh, and please also make the candle in the colors of the Tide box. I love a good challenge. Second because he wanted to see the process of the candle being made.
I pride myself on my ability to create fragrance blends that have no chemically element that I cannot stand in certain candles I've bought in the past. I also pride myself on the careful selection process of what goes in to my candles. After several tries, I finally got that "Clean Laundry" smell...and the version that makes you feel like when you get in bed with clean sheets the first time after washing them.
Without further adieu, I give you my photo documentary!
The Set-up: Wax melting in my cauldron and mason jars. I don't use fancy equipment. It is not necessary.

This is a 10 pound slab of paraffin wax. I use a special blend that is designed to burn at high temperatures and has been pre-blended with an agent to make it mottle (cracks and imperfections that I find make the surface of my candles more interesting and beautiful).

I used a 12 inch tall x 3' across seamless pillar mold. It is shown here after I threaded the correct wicking (for the wax type, for pillars and the size of the candle). The wick top of the mold as shown will be the bottom of the candle ultimately.


Here is the first pour. This is a two step pour. The first step is to add about 1" of wax and make sure the mold sealant is working where the wick is threaded into the other end of the mold. I always let it harden/cool for a few minutes to make sure the seal will hold. I learned the hard way that sometimes the weight of the hot liquid wax will permiate or loosen the seal and then you get a big insane mess. I am also, unfortunately, very experienced at cleaning up wax spills.

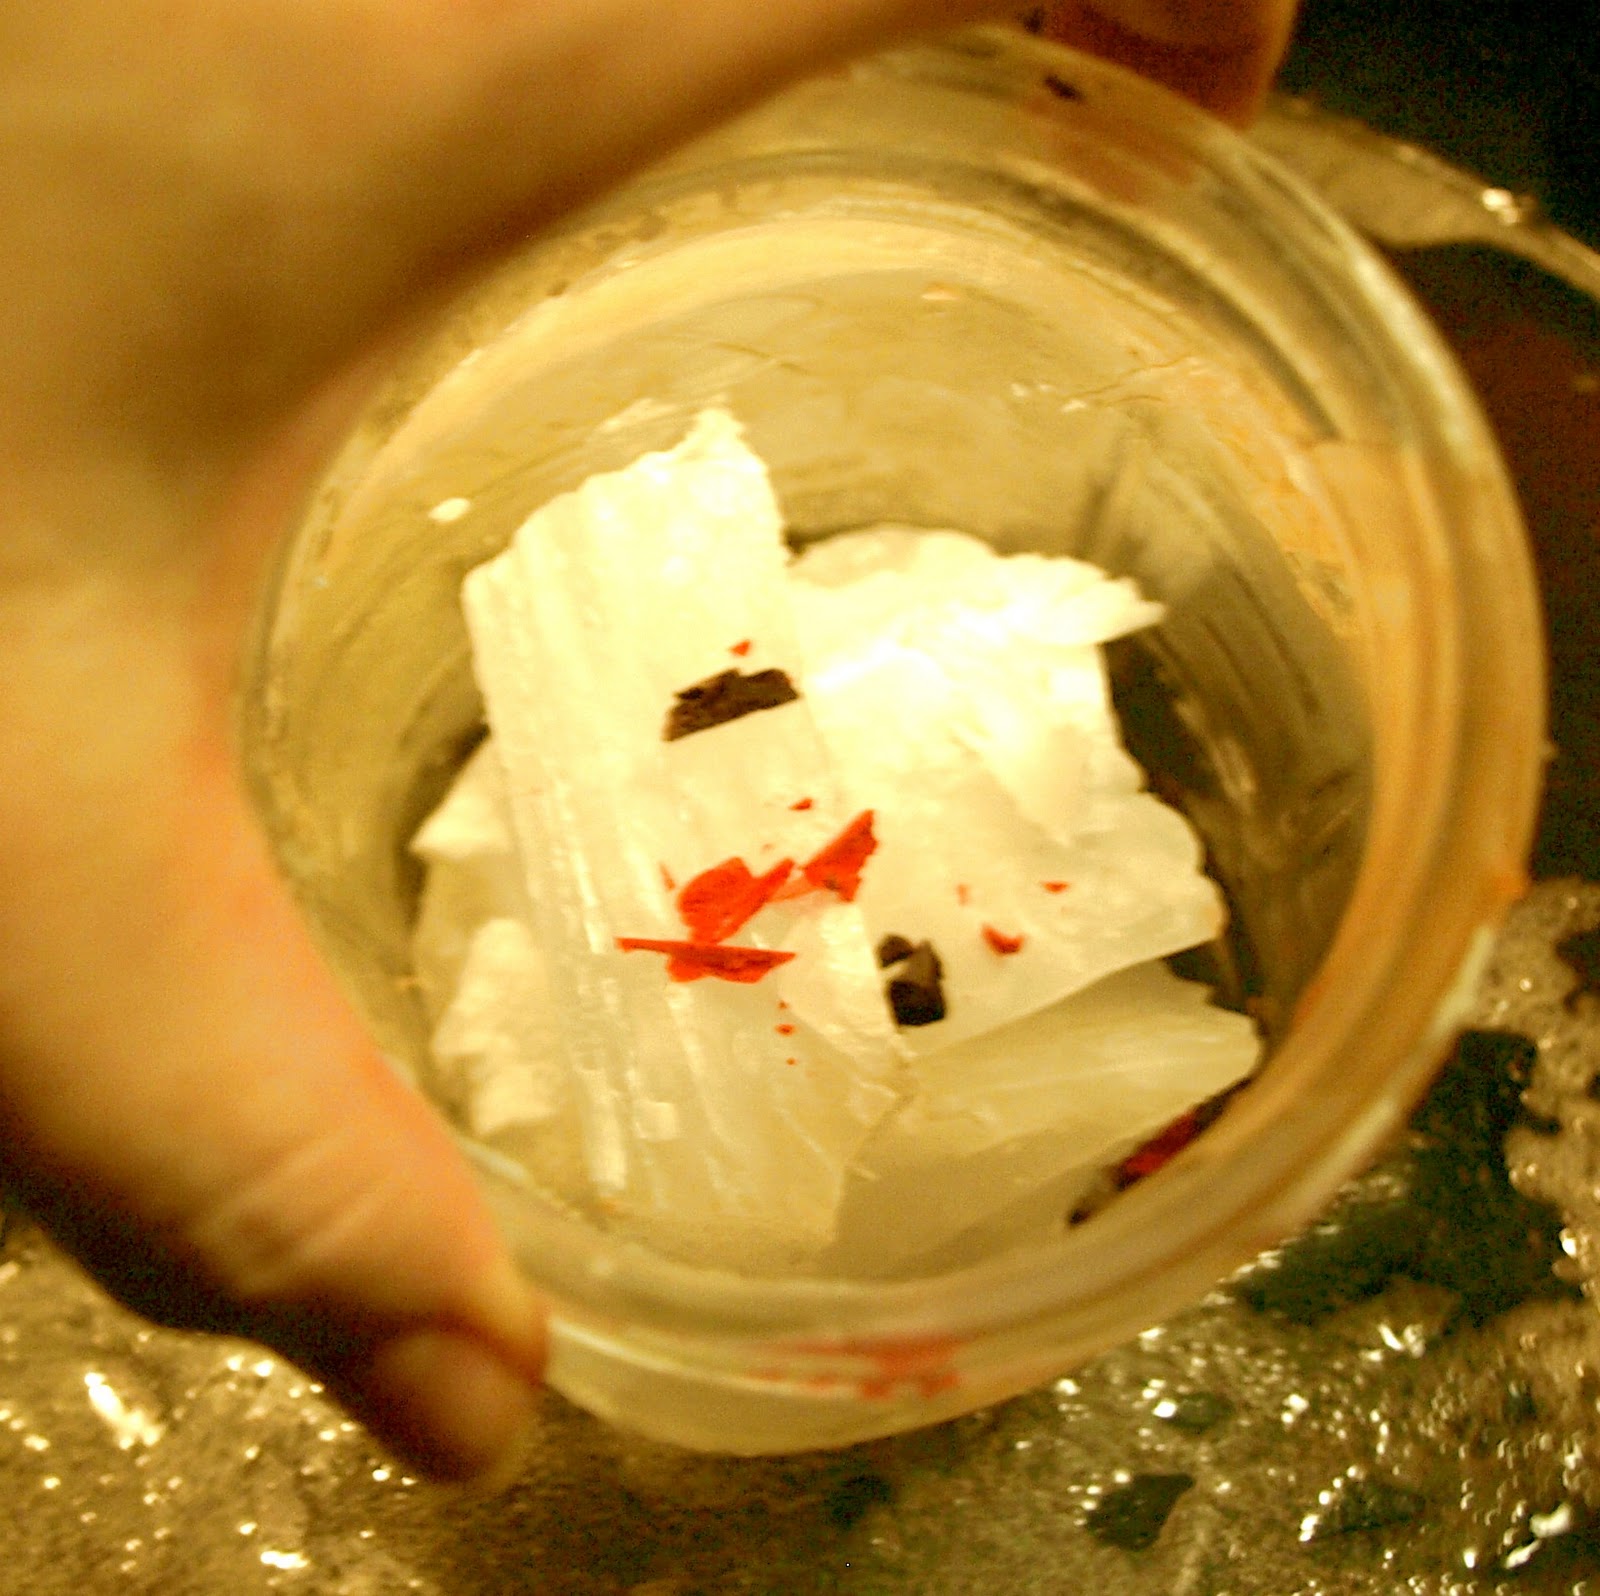
Shown below are three color blocks. I shave bits of these off to add and mix into my wax. In this candle, I used Sunflower Yellow, Pumpkin Orange, Ruby Red and Cobalt Blue mixed with Black. I mixed some of the other colors together too.

Shown below: Pieces of parrafin cut from the block and added into my double boiler mason jar. Adding color. Color mixing into melting wax


Shown Below: Adding Fragrance. It should be measured per wax and fragrance type. I make so many candles I can eyeball it.

Meanwhile, the first layer is chilling in the fridge. I cool layers in different temperatures, room temperature, fridge, freezer. That is one of my techniques for creating interesting surface effects. Call it science. Call it art. Its both!
Back to the double boiler. Now the wax has melted and is blended with fragrance and color for the second pour.


Same as before, now that the second pour is complete it is time to blend the next layer while the first and second layers continue to cool and harden. Next up, more yellow blended in.

The next few photos show color being added for the remaining layers. Since I have posted shots of the other steps of the process for each layer I am skipping a few shots in the interest of showing the finishing process and the unveiling of the candle.


Now we're ready for the final pour and the top off. The final pour leaves a half inch at the top because when paraffin cools it retracts and causes a cup shape in the top of the wax. The top-off is then poured to the top of the mold when the candle has cooled all the way to the center so that any additional retracting is minimized.


The wax pouring process is done. Now we wait for the cooling to complete. Releasing the candle from the mold before it has cooled completely all the way through the center causes mis-shaping to occur because the center wax is still warm and will cause sagging and bending of the outer surface. I secretly like a little bit of that, but I sell these candles so if they're not for me, I go by the book. Patience is a virtue here. Leave the candle overnight or put it in another room FORGET ABOUT IT!

Just before you release the candle, you can pop it in the freezer in order to cause the surface wax to retreat a slight bit. So...all of those companies trying to sell "mold release" are banking on the fact that you don't understand the physics and chemistry at work here. You don't need any of that if you understand the effect temperature has on wax. Below, I have turned over the mold and candle and peeled back the sealant. Now it is gravity that will allow me to lift the mold from the candle.

The suspense is killing me after 20+ hours of waiting for layers to cool enough to pour new layers...and then for the entire candle to cool to this point!
For the next several photos you will see only photos with no explanation! YAY!


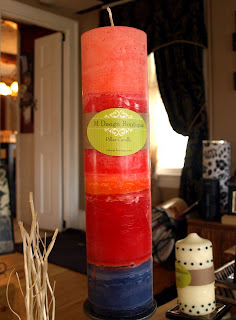
The finished product on display!


If you have made it to the end of this Photo Documentary...I thank you for your interest and time! I welcome requests for custom items like the Fresh Laundry 12.5" Pillar Candle, and in the future I will consider doing similar process documentaries like this one.
Thanks to Matthew Turner for the inspiration and the order! Every customer is important to me and I hope to show my dedication to each of you in some significant way, be it an informational display of my process or a really awesomely authentic custom request!
For those of you interested in learning the basics about making candles here are a couple of articles I have written on the topic:
and for some advanced techniques for process and finishing:
Wow...looks like such a messy process and the end result is an absolutely beautiful Pillar Candle. Bravo!
ReplyDeleteI'd love to get some candles from you for my Candle holders....